-

Generally speaking, backpackers can be divided into three camps: the hardcore “ultralight” backpackers, the “over-packers” and the economical backpackers.
Ultralight Backpacking
Ultralight backpacking is primarily a style adopted by dyed-in-the-wool minimalists who have been trekking through the backcountry for years and have invested in (or built) the lightest, most compact gear possible in order to save weight. Some ultralight backpackers adopt a minimalist mentality in order to cover greater distances and stay out in the field longer. Others simply pride themselves on having the best equipment and lightest packs possible. Don’t worry: You don’t need to be at this level before taking your first few trips. Going ultralight isn’t necessary to have an enjoyable time.
Over Packing
The over-packer is at the opposite end of the spectrum from the ultralight packer. An over-packer is someone who hasn’t quite learned how to pare things down or simply tends to overdo it. Over-packers may suffer from uncomfortably heavy packs and unnecessary fatigue. If you’re packing for a two-night trip in the summer and your bag weighs 52 pounds, you’re probably overpacking.
Economical Backpacking
Economical backpackers occupy a happy middle ground between total Spartanism and bursting at the seams. This is where the average backpacker should strive to be. If you can’t afford all the lightest backpacking gear, which can be expensive, that’s okay. There are other ways to save weight.
10 Backpacking Light Tips
- First, ask yourself: Do you need all those clothes? Two shirts, two pairs of underwear, three pairs of socks, one pair of pants, one pair of shorts, a fleece vest, a rain jacket and hat should be about all you need for a two or three-day trip in spring or summer. Better yet, consider a pair of convertible pants. Bring a small container of biodegradable soap, and you can wash your clothes in a stream if you need to. Also, choose clothing and socks made of quick-drying materials like nylon, polyester and merino wool, rather than cotton.
- Other things in your pack can have multiple functions. For example, you can fill your sleeping bag stuff sack with clothing to be used as a pillow, or use a rolled-up fleece vest. A large metal camp mug can serve as a container for both eating and drinking. Your ground pad can double as seating around the campfire.
- Consider getting a compression sack for your clothing as well as your sleeping bag. Dead air space in your pack is wasted space. The more compact your gear, the smaller (and lighter) your backpack can be.
- Ditch the storage bags for your tent, poles and stakes. In fact, do you really need all those tent stakes? Chances are you only need between four to six stakes, depending on how many guy lines your tent has.
- Use a travel-sized toothbrush and toothpaste. Unspool as much floss as you think you’ll need and wrap it around the handle, leaving the container at home. Floss can also be split in half and used as thread for repairs (just don’t forget a sewing needle). Keep other toiletries to a minimum. It’s okay to be a little grubby on a backpacking trip. Unravel and re-roll as much toilet paper as you think you’ll need without the tube to save space.
- If you use batteries for lights and other gadgets, don’t buy the cheap ones. Carrying lots of extra batteries adds weight. Get a battery tester so you can replace batteries that are nearly dead before you leave. You could also get a candle lantern and avoid batteries altogether.
- Lexan backpacking utensils are an affordable, lightweight alternative to metal utensils. In fact, if you’re already carrying a pocket knife, the only other utensil you probably need a spork.
- Determine about how many calories you’ll need each day based on your weight and gender so you can plan accordingly. Don’t forget to factor in how many extra calories you’ll be burning, depending on how far you plan to hike each day and how much your pack weighs. If you’re carrying 32 pounds of backpacking gear for a seven-day trek, you’ll burn a lot more calories each day than if you were just hiking with a 17-pound overnight pack. Once you know how many calories you’ll need each day, create a meal plan to avoid packing too much food (but you should still pack a little bit of extra food, just in case).
- Avoid heavy, bulky food items like canned goods. Dried pastas, nuts, nut butters, dried fruits, granola bars, energy bars, dehydrated foods and freeze-dried meals are all ideal for backpacking because they pack a good amount of calories into a relatively small, lightweight package.
- Plan ahead for finding water sources so you don’t have to carry too much water. Of course, don’t underestimate the water you’ll need just to save weight, either. You’ll still need enough to make it in between water sources. Carry a backup water purification method, such as Iodine tablets, in case your water filter fails. (See the water purification section for more info).
-

Your backpack is one of the most important investments you’ll make when it comes to outfitting yourself for backpacking, and it’s important to pick one that will fit well and hold the appropriate amount of gear. Backpacks from brands like Gregory, Vaude and Mountain Hardwear are usually available in a range of sizes and capacities. Need to know how much carrying capacity to look for? Curious about how to fit your pack once you buy one? Check out our handy Backpack Guide for all the details.
Backpack Quick Tips
- Trip duration and seasonality will determine how large your pack should be. About 40-50 liters is usually enough for 1-2 nights in summer. Go with 50-65 liters for 3-5 nights. For colder weather, add about 5-10 liters for additional gear.
- Measure your torso to make sure the size pack you select will fit your frame. Some packs have adjustable torso lengths, so you just need to make sure you fall within range.
- Check out this video for tips on how to adjust your pack for an ideal fit.
-
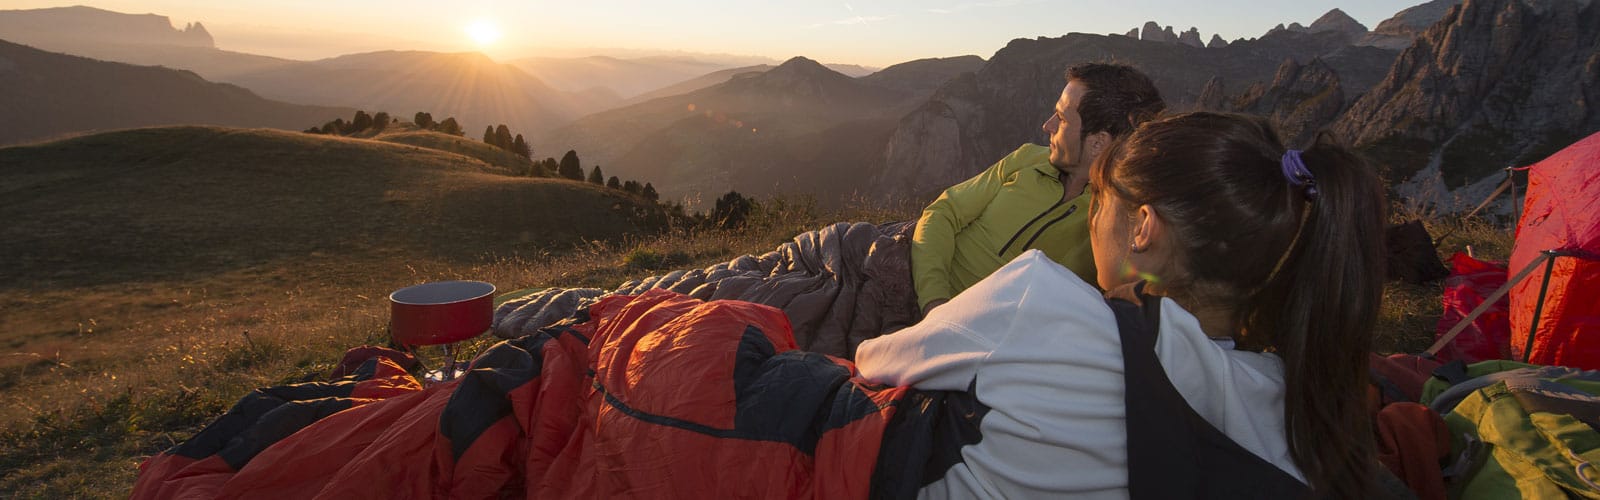
Having the right sleeping bag for the time of year and weather conditions is key to comfort. Since most backpacking is done in the warmer months, a summer bag from brands like Sierra Designs or Marmot is often sufficient for many people, although temperatures in some areas can get pretty cold at night, even in the summer. One good option is to carry long underwear, warm socks, a winter hat and a sleeping bag liner to enhance the insulating capabilities of your summer bag. Another option is to purchase a three-season bag, which will provide additional warmth and can be left unzipped if the night is warm.
Synthetic or Down?
Most backpackers prefer down sleeping bags, which can be compressed into a smaller size. This is because down insulation has a higher loft and less material is required to achieve the same temperature rating as a comparable synthetic bag. Down bags also tend to be slightly lighter than similar synthetic bags. Of course, the difference in weight and size is not so significant that a synthetic bag would be unsuitable for backpacking. Go with what fits your budget. For a full breakdown of the different styles of sleeping bags and an explanation of sleeping bag comfort ratings, visit our Sleeping Bag Guide.
Sleeping Pads
A good sleeping pad is a crucial element to getting a comfortable night’s sleep. Not only will your pad provide cushioning from the hard ground, it will also be an insulating buffer between your body and the cold earth below. Pads range from basic egg carton foam to insulated, self-inflating designs. Not sure what kind of camping pad to choose? Price is certainly a factor, as high-end ultralight pads can cost up to $150 or more. Basic closed-cell foam pads usually fall in the $20-30 range. Another option is to consider a sleeping bag with a built-in pad, such as those offered by Big Agnes. For more info on types of sleeping pads, R-values and more, check out our Sleeping Pad Guide.
-
Do you like to sleep under the stars or do you prefer a tent? Obviously sleeping outside without any sort of shelter isn’t always an option. If insects are more of a problem than weather, you could consider a mesh shelter or combine a hammock and mosquito net. A simple tarp shelter can often provide adequate protection from light rain and morning dew. If you’re backpacking solo, a one-person bivvy sack is a nice, lightweight option. If you’re trekking with a partner, a two-person tent from brands like Marmot or ALPS Mountaineering can be divided up -- one person takes the tent canopy and stakes, and the other person takes the poles and rain fly. Need some advice on choosing a tent? Check out our Tent Guide for a full breakdown.
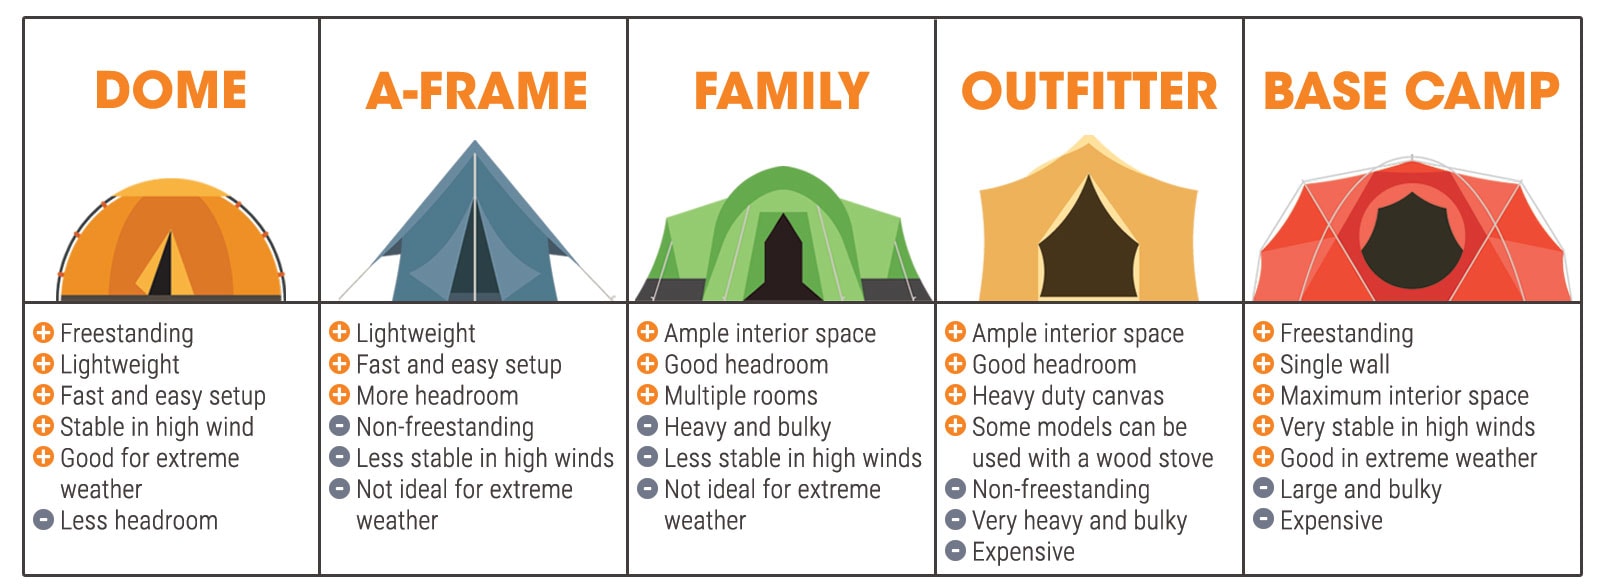
Types of Tents
(and some pros and cons of each)
-
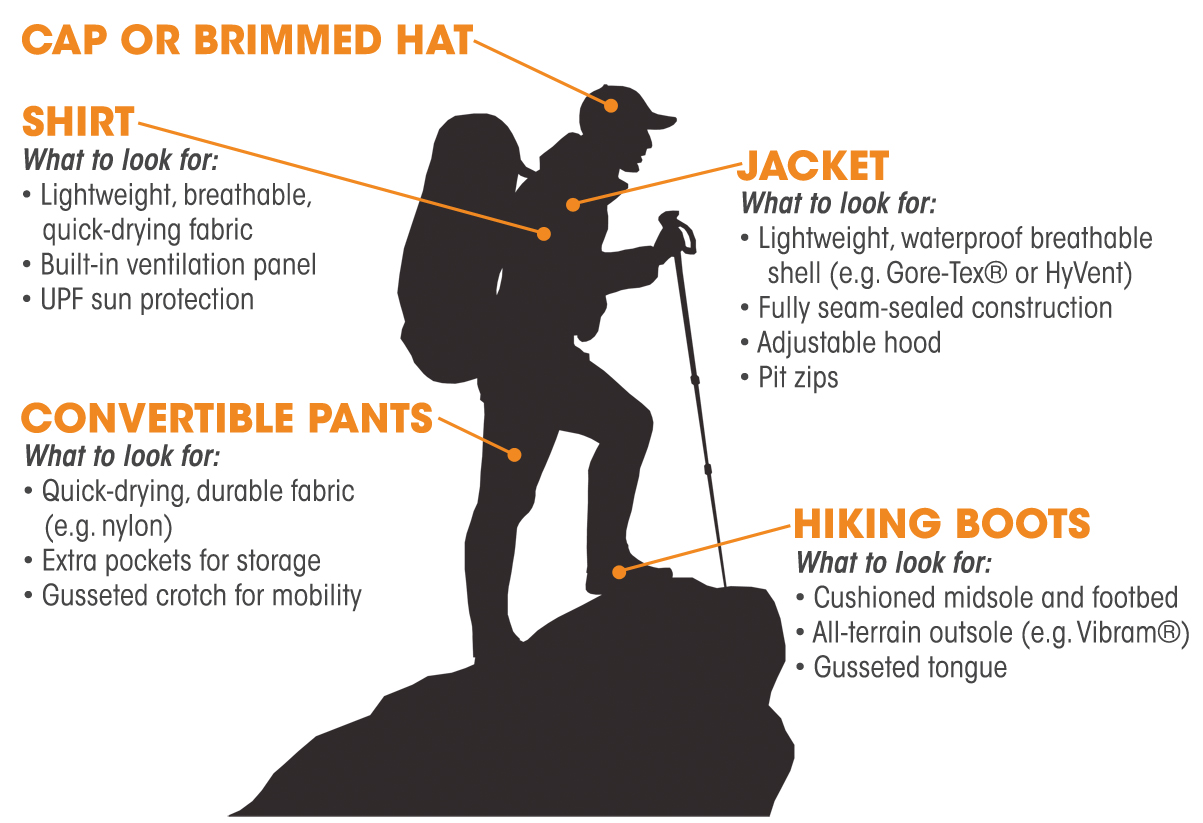
Since you’ll be packing as few articles of clothing as possible in order to keep your pack weight down, it’s worth investing a little in your backpacking clothing. Convertible pants from brands like ExOfficio and Columbia Sportswear are fantastic for adding versatility. Wicking shirts from brands like Icebreaker are also excellent options for the backcountry because they evaporate body moisture and dry quickly if you need to wash them. Also consider clothing with built-in UPF sun protection, mesh vents and waistbands designed for comfort under a backpack. Midweight or heavyweight hiking socks from brands like Bridgedale are ideal for backpacking as well, and will protect your feet with added cushioning and breathability.
What to Wear for Backpacking
-
Just because you’re packing light doesn’t mean you have to subsist on ramen noodles, beef jerky and trail mix. For starters, you could try prepackaged, dehydrated meals from a company like Backpacker’s Pantry. From simple blueberry pancakes to trail pizza, there are plenty of tasty, easy-to-make recipes available on the web and in outdoor cooking guides. Also, trying new recipes at home before you make them in the field is never a bad idea -- experiment in your kitchen first, and you may avoid surprises later.
Camp Stoves
Small gas backpacking stoves like those made by Primus are popular options, and some brands like Jetboil even offer all-in one cooking systems that make meal preparation faster and easier than ever. Did your stove come with a windscreen? If not, you can construct a simple screen using heavy-duty aluminum foil or aluminum flashing from the hardware store. Using a windscreen will make your stove cook more efficiently and conserve fuel in breezy weather. Enjoy crafting things yourself? Check out Zen and the Art of the Alcohol Stove for great information on building your own alcohol backpacking stove using an old pop can. For more information on different types of stoves, check out our Camping Stove Guide.
Stove Tips
- Make sure you place your backpacking stove on a stable, level surface before cooking.
- Clear the area around your stove of any flammable materials, such as leaves or dry grass.
- Never use a stove inside your tent.
- Don’t forget to check the fuel level in your canisters or fuel bottle before leaving for a trip.
- Always store liquid fuel like white gas or denatured alcohol in a clearly marked fuel bottle with a secure lid.
Finding and Purifying Water
When planning, it’s important to do some research on what types of water sources will be available during your trip and where you can find them. This will help you determine what sort of water purification gear you’ll need and also allow you to plan for how much water you should pack as you hike from location to location.
There are two methods used to make water safe to drink in the outdoors: filtering and purification. A good quality filter should be able to remove unwanted particles, organic material and larger microorganisms. Purifying (e.g. boiling or adding purifcation tablets) is used to kill harmful organisms like bacteria, protozoa, cysts and viruses, but doesn’t remove particles. If you collect water and notice that it’s discolored and/or cloudy, it’s a very good idea to filter it before purifying it. Most backpacking filters are designed to remove particles and most organisms. However, even a 0.1 micron filter may not be able to remove viruses, which is why purification is another important safety step. According to the CDC, water should be boiled for at least one minute to reliably kill organic pathogens. At elevations above 6,562 ft. (2000 meters), you should boil your water for at least three minutes.
Tip: Avoid cross contamination when collecting water. Always have at least one container for dirty water and one for clean water. Make sure both are clearly marked, so you don’t accidentally mix them up.
-

When it comes to safety, the most important thing you can remember is to tell someone (or better yet, a few people) where you will be traveling and when you expect to be back. If no one has any idea where you went, your chances of getting rescued in an emergency are virtually nonexistent. Carrying survival gear and a first aid kit is another important aspect to backcountry safety.
Weather
Although it may be 80 degrees out and clear skies when you set out for your weekend trip, the weather could change dramatically over the course of a few hours, especially in the high country. Some areas, although warm in the daytime, can become quite cold at night. Summer storms can quickly turn a pleasant backcountry trek into an unpleasant and possibly dangerous situation. Don’t be caught off guard by unseasonal snowfall, flash floods or other weather phenomenon. Always be prepared for the worst-case scenario and have a plan. Choose your tent spot carefully to avoid potential drainage from heavy rain.
Camp Fires
Research the area you will be traveling before lighting that camp fire. Some areas may have fire restrictions or total fire bans, if the conditions are dry enough. If you’re able to have a fire, always ensure any coals are completely extinguished before leaving camp. If you create a fire pit, do your best to return the area to the same condition you found it in.
Wildlife
If you plan on being in an area populated by bears or other hungry critters, be sure to cook and store your food a generous distance from your sleeping area. It’s also recommended that you store food and any scented toiletries (bears can be attracted to deodorant and soaps) out of reach by using a bear bag, which will also work to protect your supplies from hungry raccoons, mice and other animals. Some national parks require the use of a special bear-proof container. Finally, carrying bear spray is also recommended, especially if you plan on backpacking in grizzly country, such as Yellowstone National Park, Glacier National Park, and parts western Canada and Alaska.
Navigation
One aspect of backpacking that can be intimidating to newbies is learning how to find your way off the beaten path. Using a map and compass can be a tricky skill to master, but it’s important to have a solid grasp of navigation before venturing into the backcountry. For those who are just starting out, consider sticking to a well-marked trail system, which will make things much easier than blazing your own trail. You’re much less likely to get lost if you stick to a specific trail, although it’s still a good idea to carry a map. For a wealth of information on navigating in the wilderness, including how to read a topographic map, check out BackcountryAttitude.